Portable Mini Golf Setup and Teardown Guide

Portable Mini Golf Courses are an awesome and hassle-free addition to any event or backyard. Mini golf, or putt-putt, has endured as one of the most beloved family-friendly pastimes for a generation – now you can bring the fun anywhere with easy and intuitive transportation and setup features.
Milco MFG, LLC offers premium portable mini golf courses that are perfect for any space. They are made from high-grade aluminum to be light yet durable, and their design ensures hassle-free transportation, set-up, and tear-down.
Check out Milco’s selection at portable-mini-golf.com.
Preparing Your Portable Mini Golf Course for Setup
Before you begin the set-up process – make sure you are happy with the physical area you are considering.
Is the ground even?
Is there room for players to keep safe distances? (It’s not uncommon for over-excited club swinging to take place)
Are there any obstacles or hazards nearby? (Think of golf balls rolling towards a street or sewer drains)
Essential Tools and Equipment
Before getting started, gather all the necessary equipment to streamline your setup process.
Milco’s portable mini golf courses are designed with ease of use in mind, but having everything in place makes a huge difference.
Along with the essentials like putters, balls, and LED lights, Milco offers rolling transport racks. These racks are perfect for moving and storing course modules and obstacles. Their sturdy design promotes safe transport, keeps everything organized, and reduces the risk of damage.
With these tools, your setup and teardown become faster and more efficient.
- Portable course modules (Express, LED, many more)
- LED lighting (for evening events)
- Aluminum putters and balls
- Rechargeable batteries
- Transport carts (for easy movement)
Step-by-Step Setup for the Express 9-Hole Portable Mini Golf Course

Assembling the Course Modules
The 9-hole Express course features a quick setup thanks to its lightweight aluminum modules.
The set-up process is a breeze, and each module is lightweight enough for one or two people.
Here’s how you can assemble it:
Start with positioning the modules where you want your course to begin. Connect each one in sequence. Carefully align and lock all parts into place.
| Module | Weight (lbs) | Dimensions (ft) | Assembly Time (min) |
| Straight Module | 45 | 10 x 2.5 | 5 |
| Corner Module | 50 | 8 x 2.5 | 6 |
| End Module | 40 | 9 x 2 | 4 |
Positioning Mini Golf Obstacles for Optimal Gameplay
Obstacles make for an enjoyable and challenging mini golf course. The powder-coated and LED obstacles from Milco are lightweight and easy to move. Here’s how to get it right:
First, decide the level of difficulty. For younger players, you may want to place obstacles like the Bridge and Ramp in straightforward positions.
For advanced players, consider more intricate placements like the Loop or the Windmill on tighter corners.
Secondly, check all attachments are secure and in place. A stable obstacle not only provides a better challenge but also prevents accidents during play.
Step-by-Step Setup for LED Portable Mini Golf Course

Connecting and Placing LED Modules
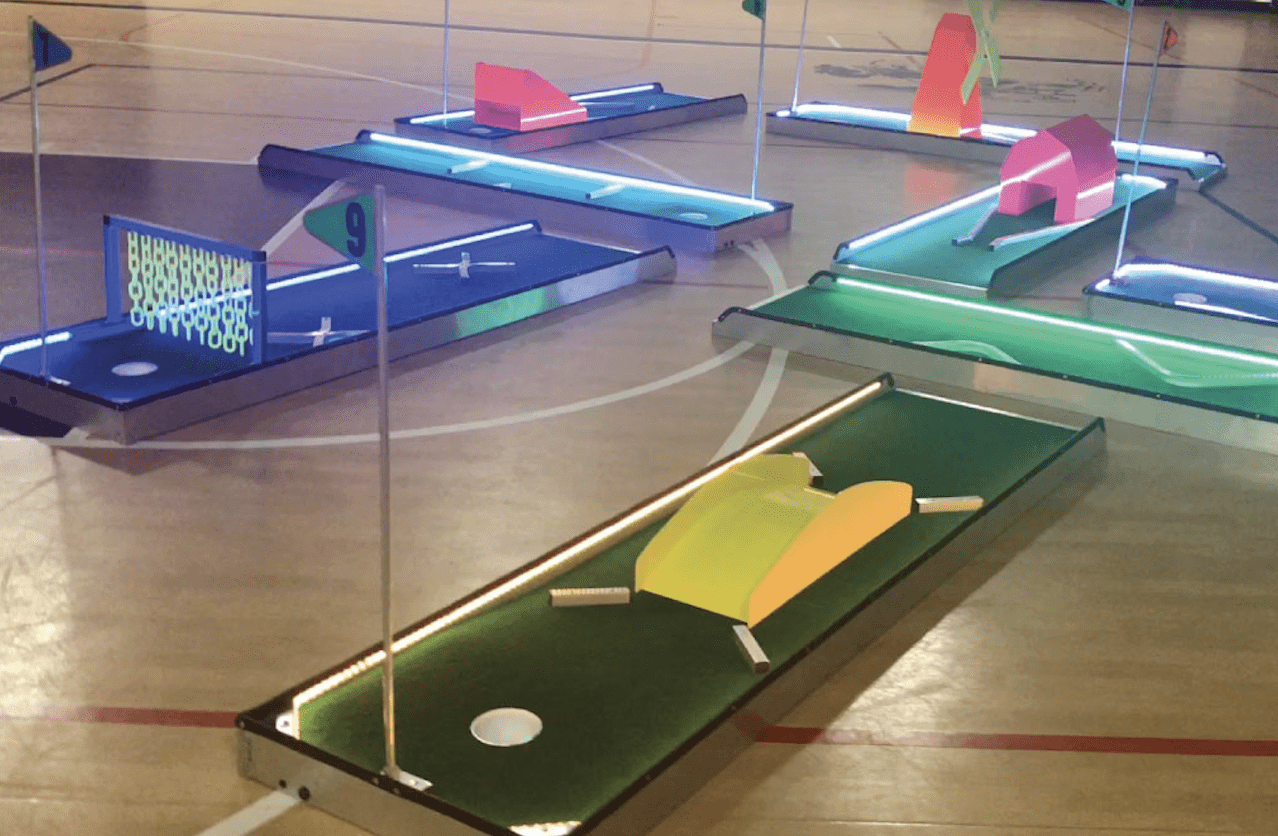
Setting up the LED modules is a straightforward process, whether you’re indoors or outdoors. The flexibility of these modules makes them ideal for various environments.
Here’s how to get it done:
- Positioning LED modules based on the environment.
- Connecting the modules with the provided connector links for optimal lighting.
- Making sure all batteries are fully charged before play.
- Placing glow-in-the-dark balls and putters to enhance gameplay.
- Performing a final setup check to confirm everything is ready for play.
Ensuring Visibility and Safety
LED lighting boosts visibility, especially in low-light settings. Spread the modules evenly to avoid shadows and create blended colors for an elevated ambiance.
When setting up outdoors, there are a few important safety points to consider. Keep electrical components away from wet surfaces. LED modules are designed to be weather-resistant, but it’s still important to handle them with care during setup and teardown.
Double-check the stability of the modules after placing them, especially in outdoor environments where wind or uneven surfaces could impact their position.
Placing Portable Obstacles to Enhance Challenge

Selecting the Right Obstacles for Your Setup
Obstacle placement is a game-changer when it comes to increasing the fun and challenge of your mini golf course.
Think about who’s going to be playing—kids, adults, or a mix? Once you know your audience, choose obstacles that fit the difficulty level you’re aiming for.
- Bridge: Adds complexity to straight holes.
- Loop: Great for skilled players.
- Windmill: A classic for kids.
- Barn: Introduces a rural theme and challenges alignment.
- Wall of Chains: Requires precision to pass through.
- Tire Dodger: Tests timing and accuracy.
These obstacles not only add variety but also make the course much more engaging for all ages.
Efficient Teardown of Portable Mini Golf Courses
Disassembling Modules and Obstacles
Breaking down the course is just as easy as setting it up. Begin by removing the obstacles and storing them properly. Disassemble each module carefully.
Be sure to avoid straining your back or pinching your fingers.
Handle each module with care to avoid damaging the aluminum structure. Once everything is disassembled, store the components efficiently for next use.
| Component | Teardown Time (min) |
| Express Course | 10 |
| LED Course | 12 |
| Obstacles | 8 |
Storing Components for Next Use
Proper storage is key to maintaining the longevity of your mini golf course.
Give each piece a quick clean to remove dust or dirt after they are disassembled. This helps preserve the quality and usability of the materials.
- Clean each module before storing.
- Store obstacles in dry areas to avoid rust.
- Keep LED lights in a cool, dry place to prevent battery drainage.
Troubleshooting Setup and Teardown Challenges
Common Issues with LED Courses
LED courses are designed for smooth operation, but like any system, occasional issues can pop up.
Addressing these right away ensures minimal disruption to gameplay.
- LED not lighting up: Check connections and batteries.
- Battery drains too quickly: Charge overnight for full usage.
- Modules not aligning properly: Adjust and secure properly to keep the course stable.
Solutions for Difficult Obstacles
Obstacle placement can sometimes be tricky. Balance and stability are key to avoiding frustration during gameplay.
Here’s how to fix common issues:
- Check obstacle stability before play.
- Adjust obstacle placement based on course layout.
- Test obstacles for smooth gameplay.
Conclusion: Mastering Portable Mini Golf Course Setup and Teardown with Milco
Now that you know just how easy it is to transport, set up, tear down, and store your portable mini golf courses, you are ready to entertain with confidence.
Trust Milco MFG, LLC to provide top-quality, portable mini golf courses. We are dedicated to pushing the yard and event games industry to the highest standards, and our premium portable mini golf courses are a testament to that. We never sacrifice quality – our mission is always to exceed expectations.
Check us out online today!
